Trnio Plus Navigation Guide
General
This section will review general navigation of the Trnio Plus app, including what different buttons mean and where to complete certain actions within the app.
When you first open Trnio Plus, you will see an empty home screen. In order to start your first scan, press the “Plus” button on the top left of your home screen.
When your scan is Uploading, you can navigate to the “Upload Manager” to check its’ progress. You can find this by clicking on the three-bar menu on the top right of your home screen, then clicking “Upload Manager”. Please keep the app open while your scans are uploading.
You’ll also see two buttons in the top right corner of your scan. The left (export) button will open the Export menu, where you can view the free and subscribed export options. The right button (3 dots) will open a menu that allows you to view the photos used to complete your scan, edit your description, report an issue or delete your scan.
Once you have filled up your homepage with scans, you can also click the “Grid” button on the top right of your home page in order to view your scans in Grid mode. In order to view the Options Menu for each scan, you’ll need to long press on an individual scan.
Importing Photos
With Trnio Plus, you can import photos on their own, or you can add them to a LiDAR or an ARKit scan for some extra sharp detail. Importing photos on their own is pretty simple - just click the Plus button on the top left of your home screen, choose “Import Photos” and select from your camera roll, iPhone files, or iCloud Drive.
To import photos with another scan, you’ll need to add them after you have already captured your LiDAR or ARKit scan. After you have done this, the “Publish Scan” page will appear. Press the “Add” button to choose up to 100 photos from your camera roll, iPhone files or iCloud Drive. Make sure to do this before pressing “Process Scan”, as you will not be able to add photos after your scan has been processed!
Editing Scans
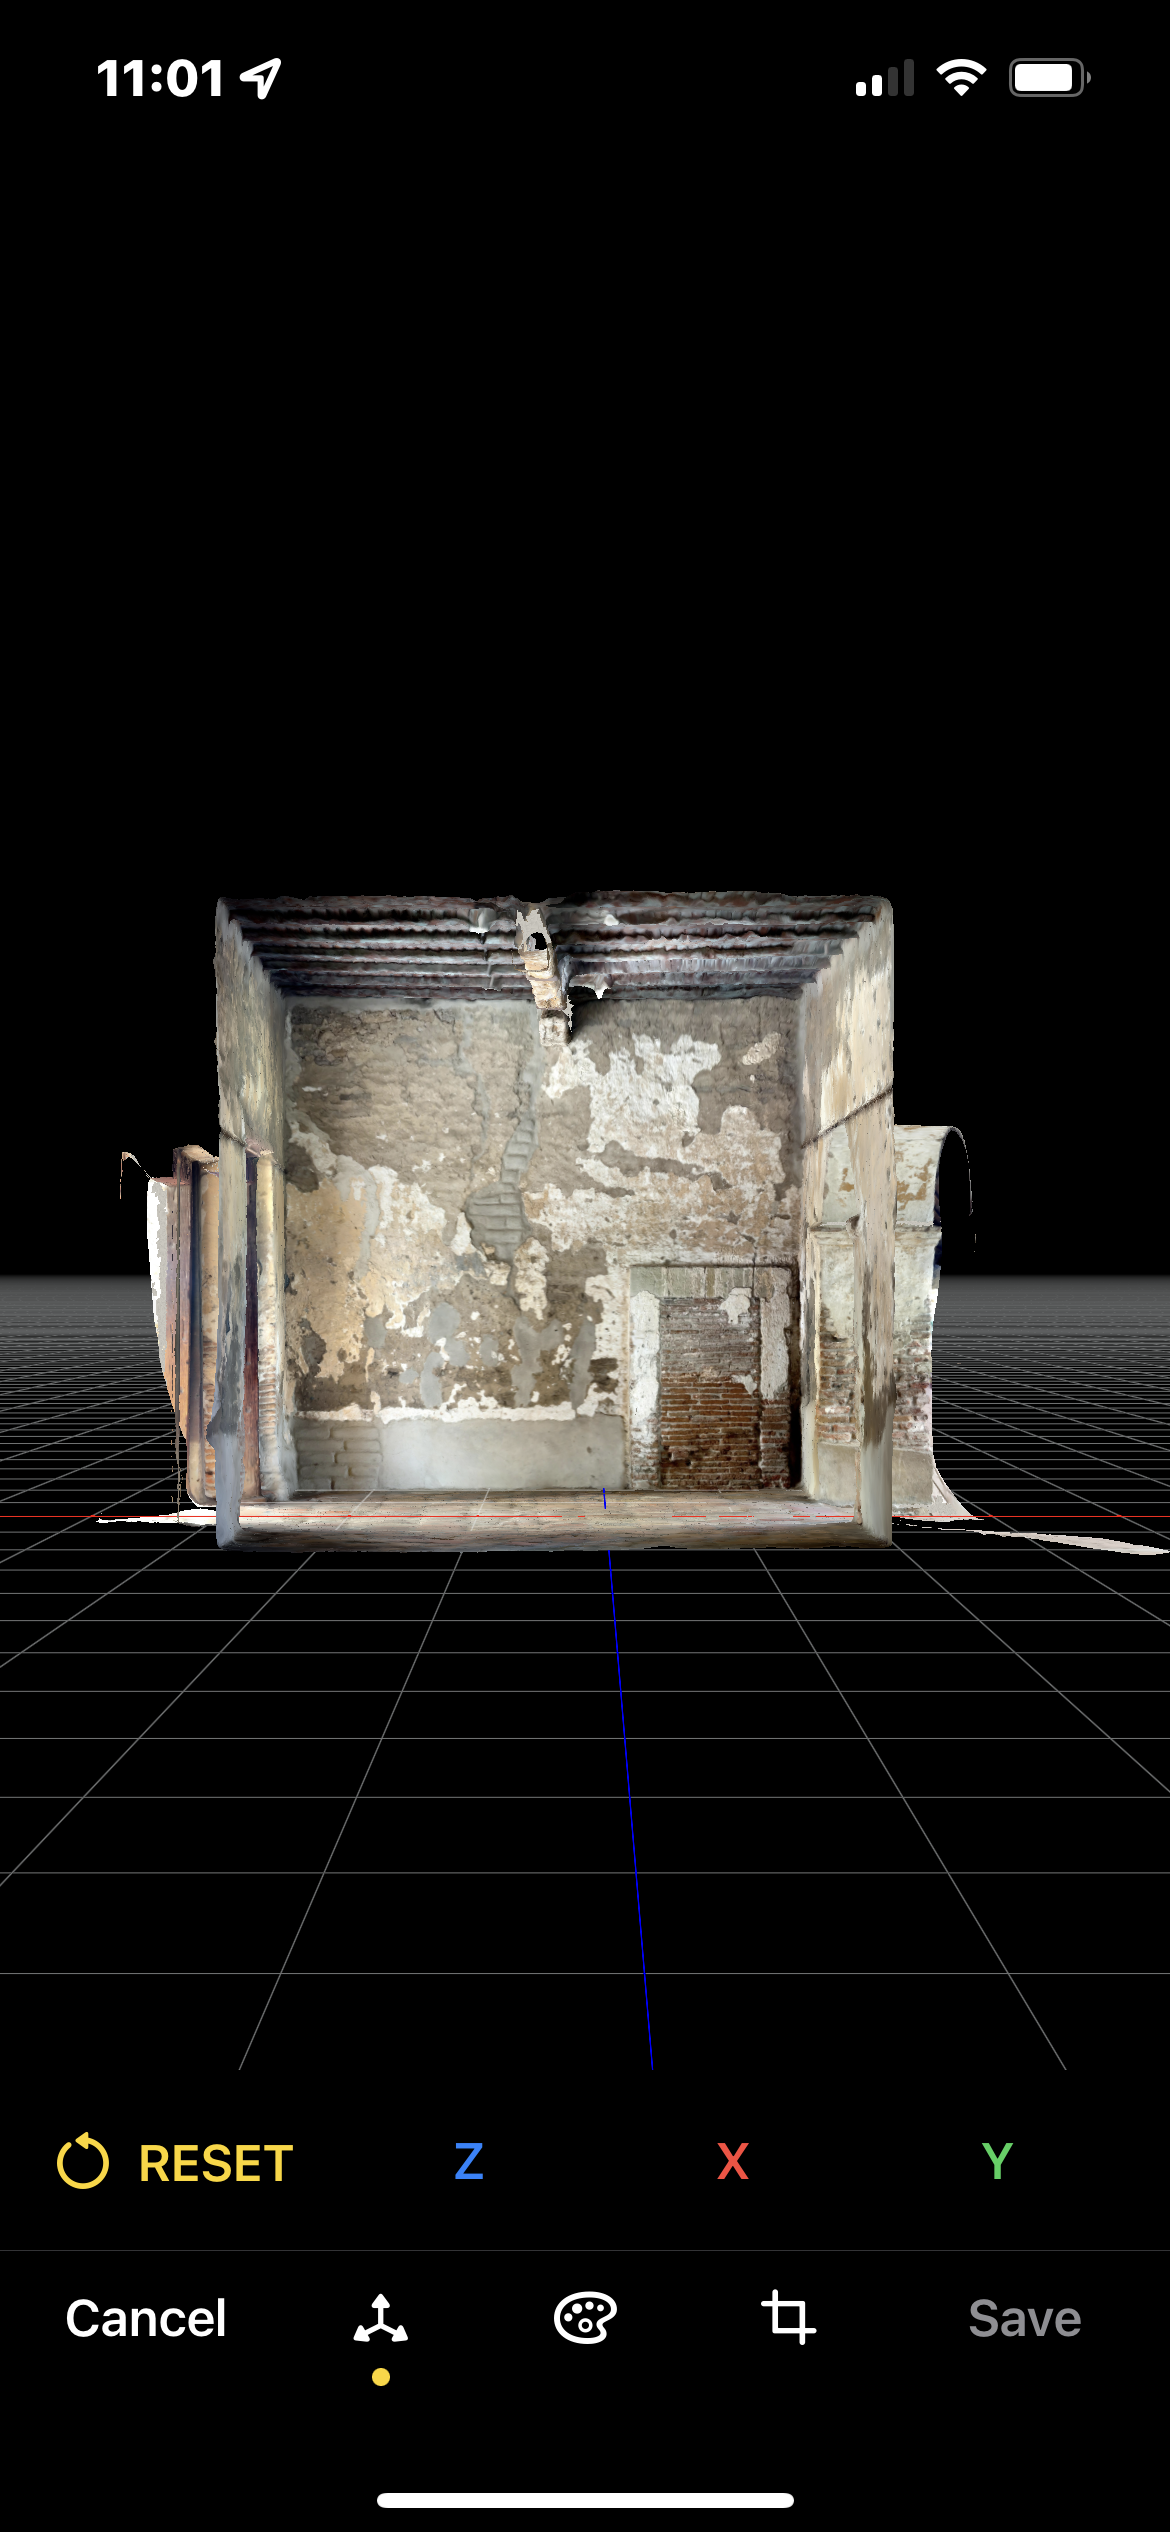
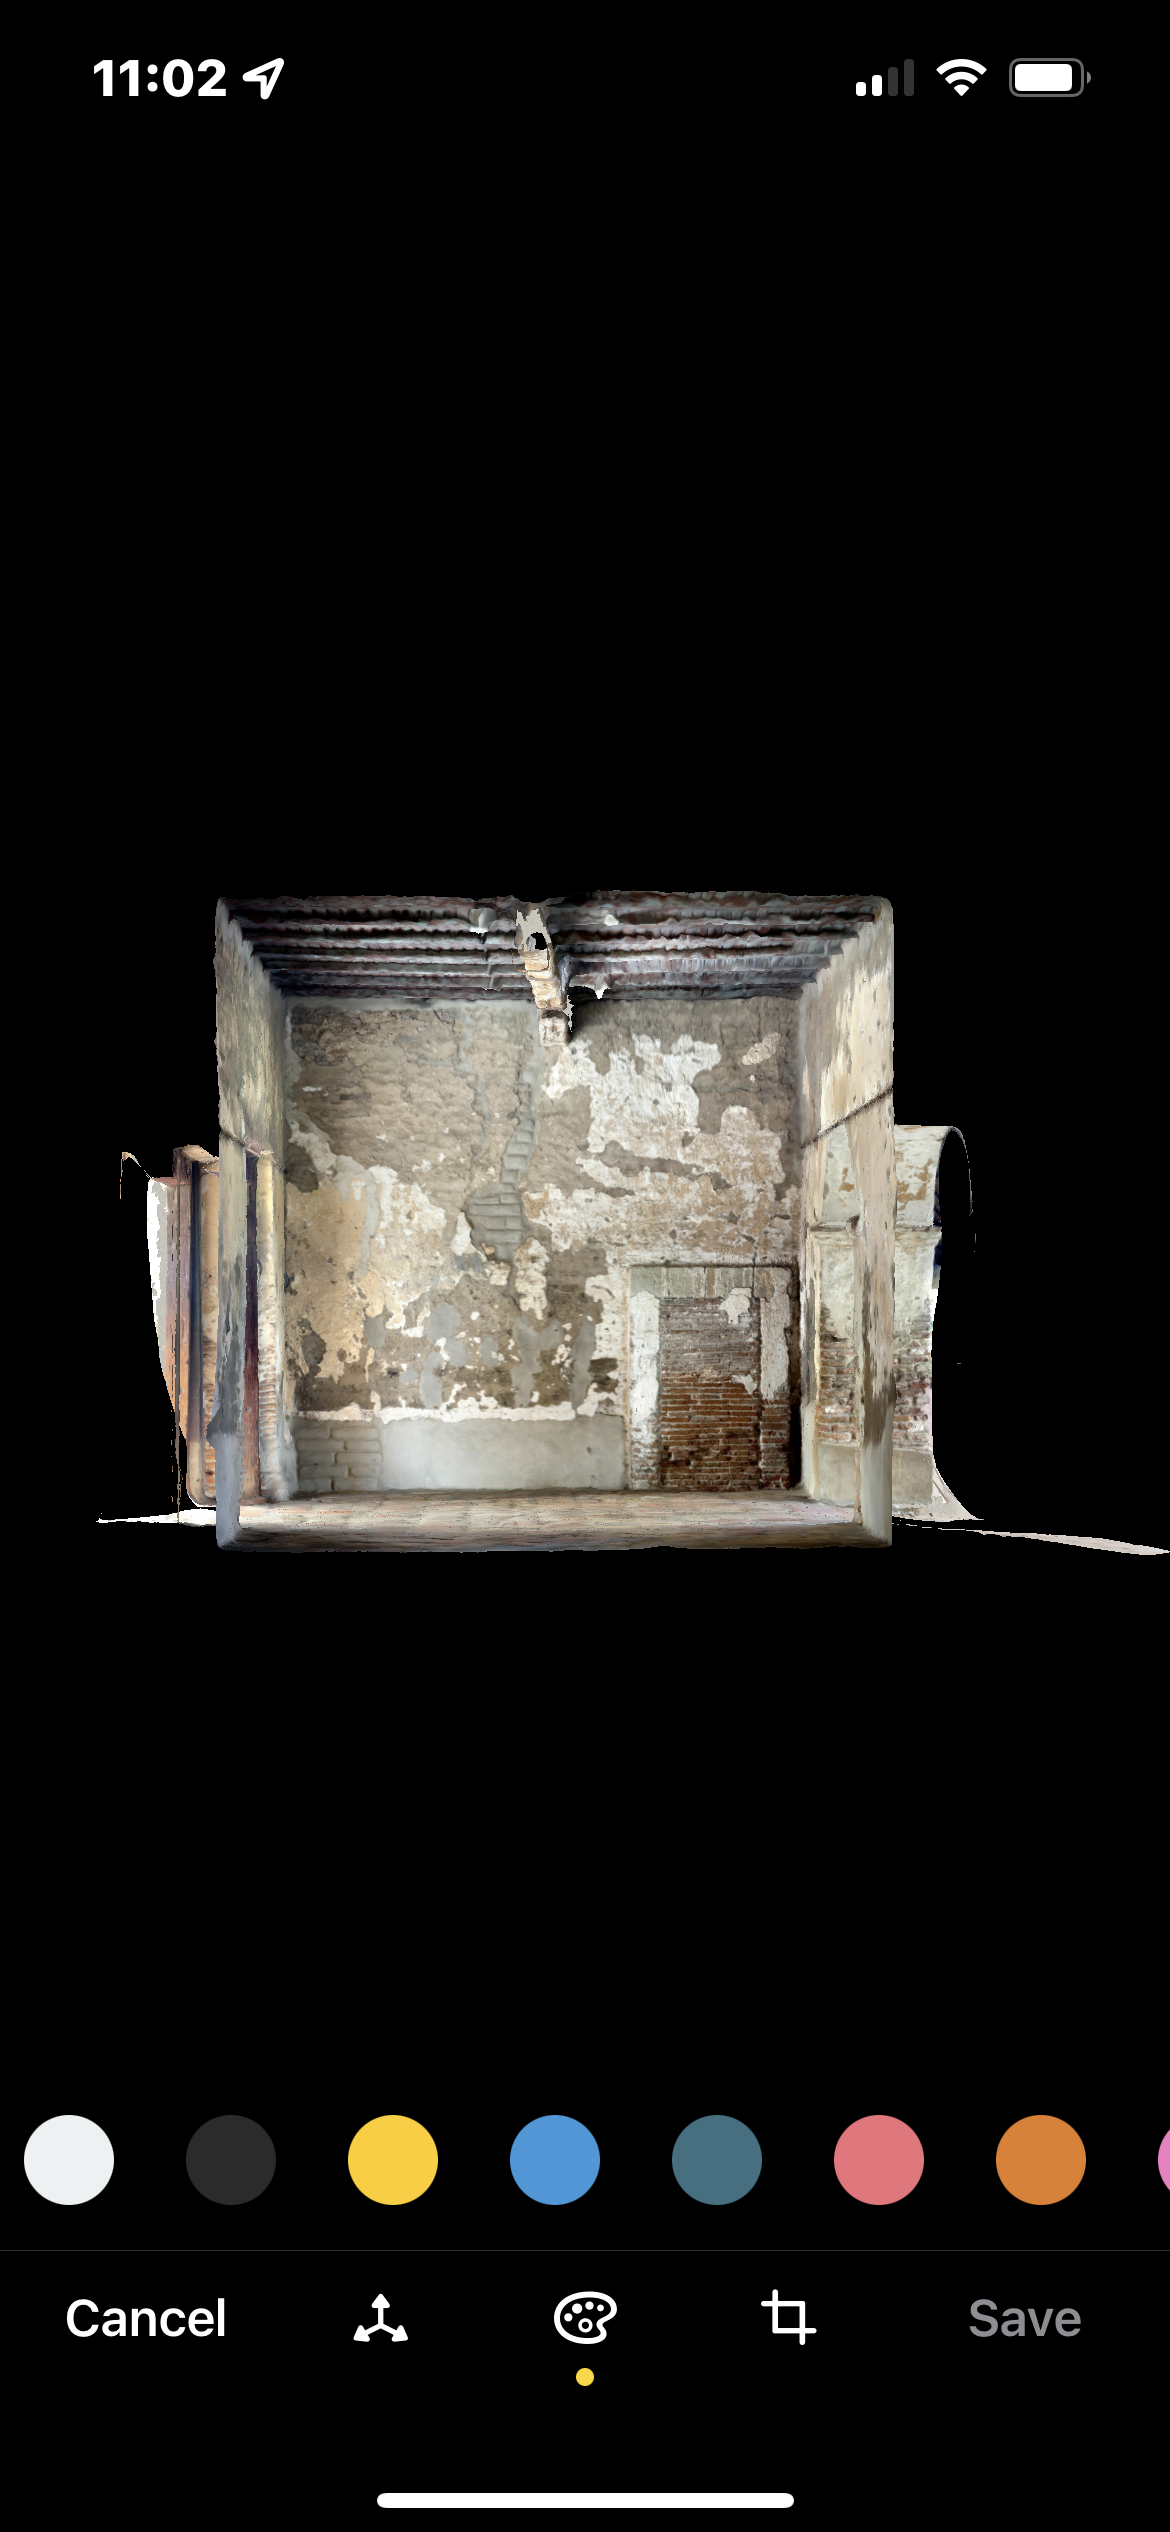
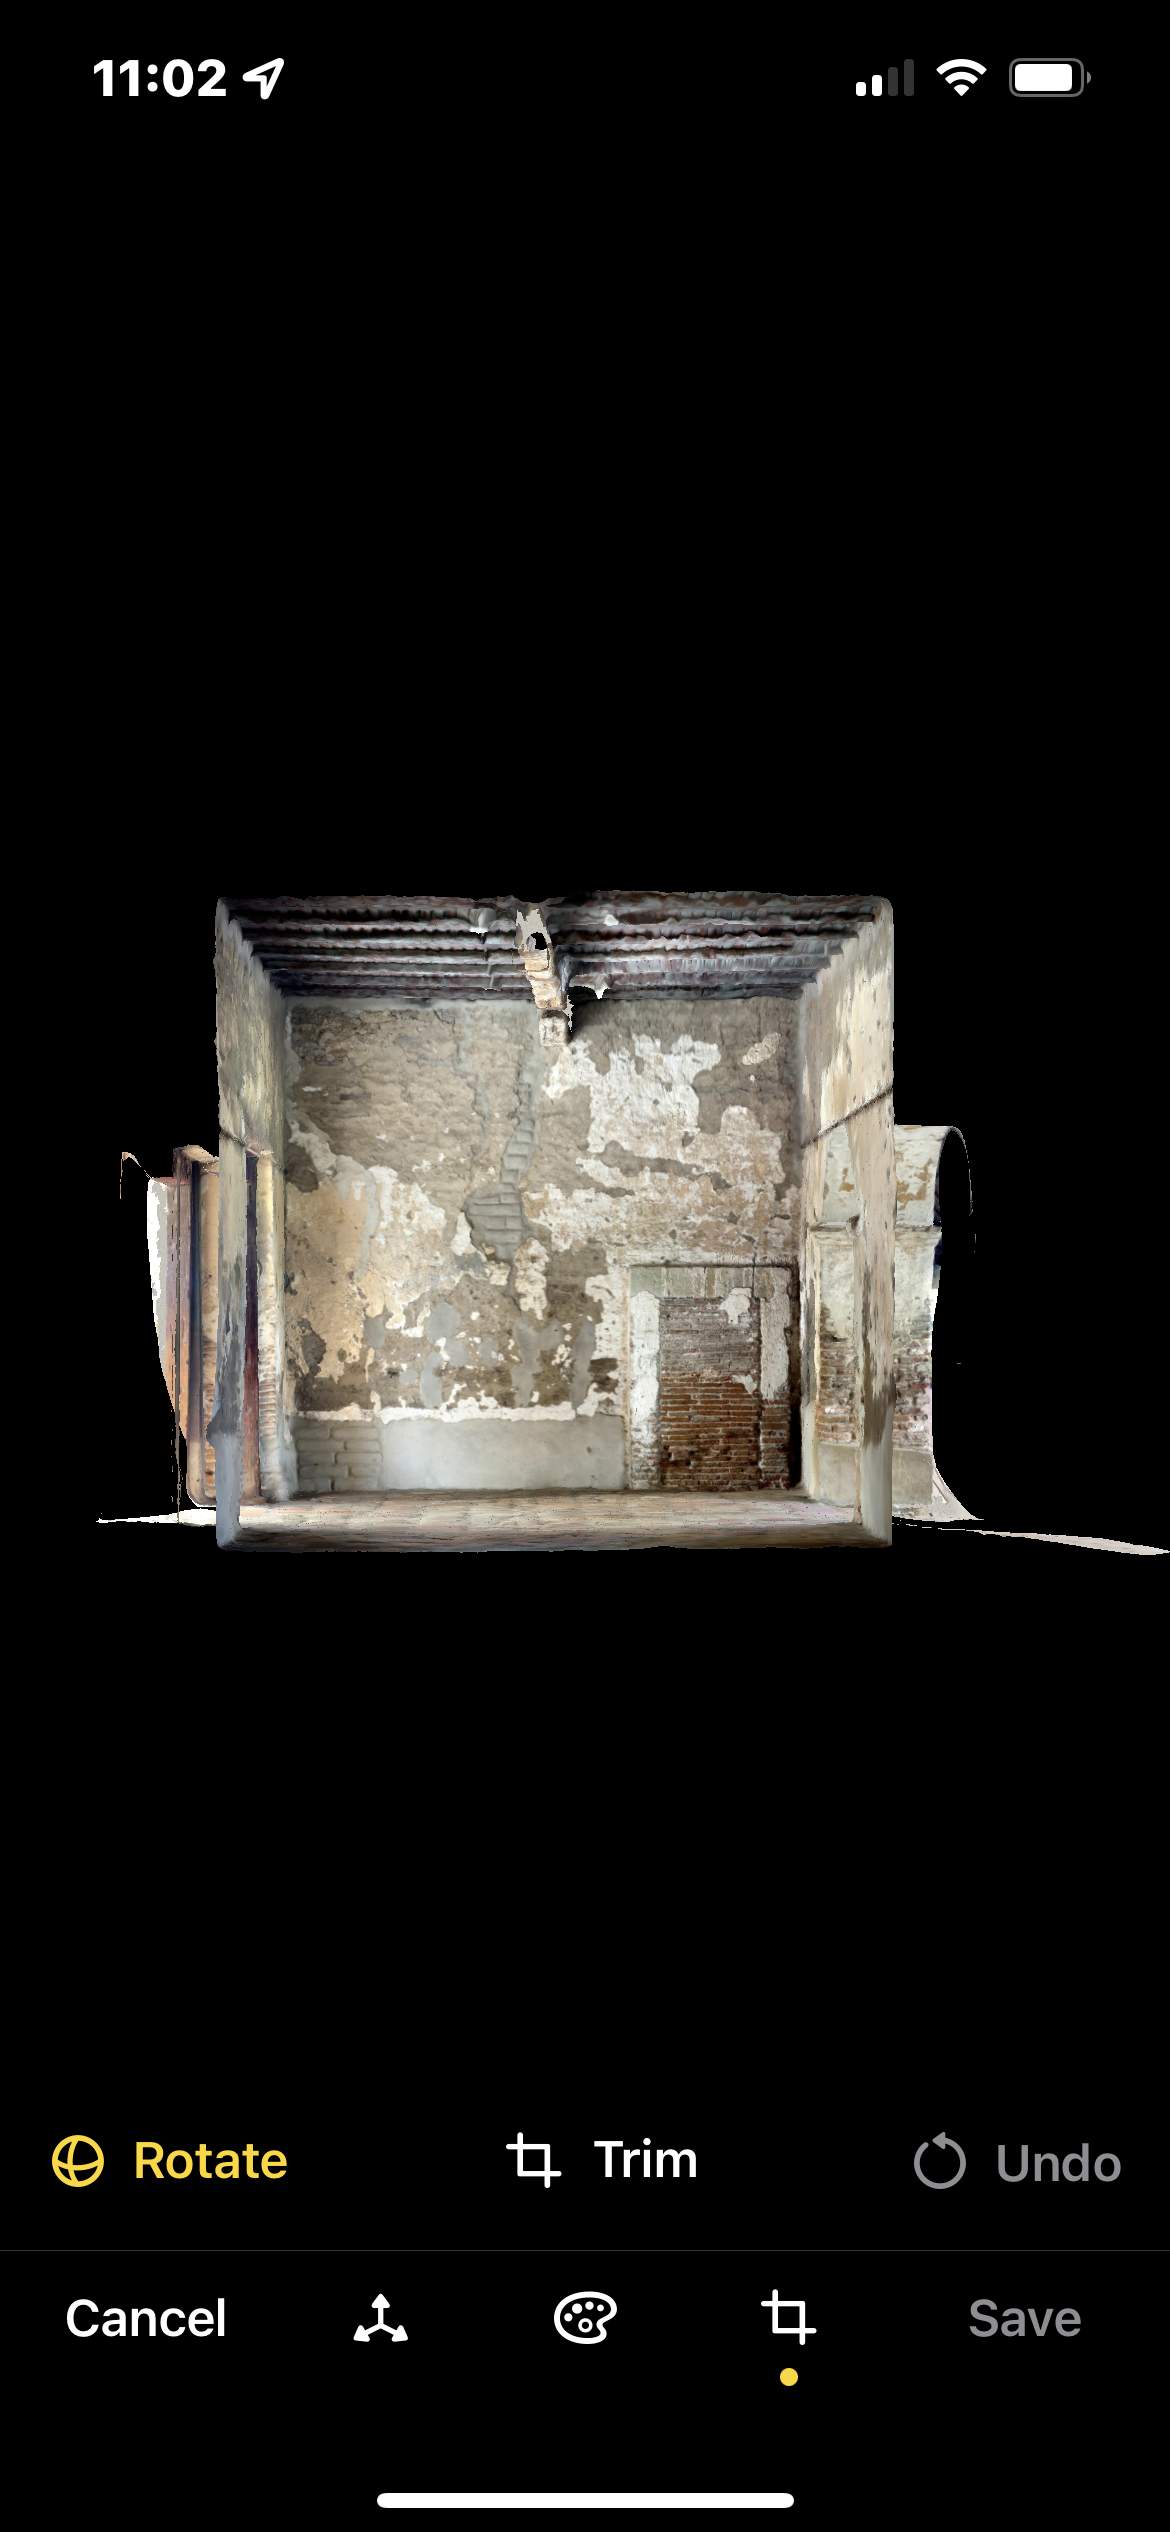
In the Editor, you will see three buttons on the bottom of the screen.
The left button indicates the alignment controls. In this view, you can align your scans along the X,Y and Z axes.
The middle button indicates the background colors that you can choose from.
The right button indicates the trimming controls. On the left, you’ll see “Rotate”. When this is highlighted, you can rotate your model. In the middle is the “Trim” button. When this is highlighted, you can use your finger to delete parts of your scan. You can press “Undo” if you make a mistake.
Exporting Scans
To export a scan, press the export button on the top right of your scan. This menu will appear where you can view your export options.
We currently have 2 free export options for those on the free trial. These include a video export option and a Nira viewer weblink. These options do not include a download file, but you can view your scan mesh on the Nira website.
We also have these file types available for export, as well as these other 3D sharing platforms. In order to export, you will need to be subscribed to one of the Monthly or Yearly plans. Please see our support page for more information on export pricing.


